mercoledì 2 gennaio 2013

Building a 9:1 Un-Un for longwire antenna


I'm always fascinated by the "magic" 9/1 un-un for longwire antennas, also called "Magnetic Longwire Balun". You build this device, connect the transceiver and a longwire antenna of almost random wire, and GO!!! No SWR on 160/10 meters, no Tuners, perfect.....OR NOT?

The background study:
If you google "Magnetic Longwire Balun" you may find a lot of experiences of many ham operators all around the world about this antenna. The cores used for Un-Un are various: ferrite sticks, FT and T Amidon toroids and even cores from old TV EAT transformers.

There is also a SWR table versus wire lenght, found somewhere in the 'net attached to manuals of commercial longwire antennas (click image to enlarge):


I suggest to look at M0UKD web site for a quick guide to build a 9/1, If you want to deep in with different cores and expected performance, read:

  •  G8JNJ web site has a very good article (http://g8jnj.webs.com/cometcha250b.htm) on building a clone of the Diamond BB6W wideband antenna (scroll down...). The balun used is a 6/1 but there are some interesting facts and tests on various cores.

Building the 9/1 Un-Un 
My requirements was:
  • 80m to 6m use
  • QRP or max 100W power
  • light and little for portable use
I use an Amidon toroid, a T130-6 with 9 turns trifilar using insulated stranded wire. For the box, I choose a grey PVC coupler (40 cm diam.)  and two caps. Connectors are PL female for TX and M5 screw for antenna wire.


The Un-Un have no hooks for hanging, but I arrange also two insulators made of hard white plastic (teflon?) from a chinese chopping board. The right one is for connection to Un-Un (using the third hole for hanging) and the left one is for wire end.


The SWR of Un-Un with a 470 ohm dummy load was measured and better than 1.3:1 from 3.5 to 50 MHz..
I've made several 9/1 for me and for some friends using different materials. On-air performance is sufficient, not bad for a so simple antenna.

Cores used in the Un-Un :
  • Amidon toroid (T200-2, T130-6, FT140-43, FT240-43)
  • Unknown Yellow-and-White toroids (I suppose are for switching power supply)
  • Ferrite sticks from old AM radios

In order to chioose the core material, mind this simple facts:
  • Using Amidon cores (in particular TXXX-2 and -6) the losses are relatively low and the performance of the antenna is better, but in the lower bands you may need a antenna tuner to obtain good SWR. Otherwise, if you don't like to bring ATU, try to use a "long" coax feeder (more than 10 meters)
  • Using low frequency toroids or ferrite sticks the losses incrase a lot, but this lower your SWR and you don't need an ATU at all.
Another 9/1 Un-Un I made for a friend with ferrite stick


UPDATE!
Look my new "Shorted" longwire antenna


lunedì 31 dicembre 2012

Mayor update to the shack!

In the last three months some new radios comes to the shack! Let me present the new entries:

  • ICOM IC-7200

This is really a G-R-E-A-T Radio!!

- HF and 6m SSB-CW-RTTY-AM (no FM at all, no chat in 10 and 6m, too serious radio for this)
- 100 W power out (no problem for QRP: power may go don to 2 Watts)
- Rugged style, heavy weight, splashproof, looks similar to military manpacks
- Digital IF DSP, 3 different user selectable settings
- Manual and auto Notch filter
- Direct connection to PC USB port!!! (no need for CI-V, modems, cables and other junk)
- Simple to use, no bells-and-whistles
- Simple settings

Fantastic, for me is Nr. 1!

  • Polmar Wild


In my neighbor 2 meters FM activity seems to awake again  after a while. I spend many hours of the day in my car because my job is far from home (sigh....), and I've bought a vehicular VHF radio.
This radio is identical to TYT TH-9000, Polmar is an Italian brand who sells this radio with two-years warranty and local servicing, at a price almost identical to the "original" chinese sellers (if you don't believe, look at ebay and see!)

Pros:
- Small and light, big heater sink
- Cheap and simple to use
- 60 W power out in 136-174 coverage
- Usable as ham operator and LMR (CTCSS, DCS, 2 tones, 5 tones, password to protexct settings, etc.)
- Compander! (really, this radio have a compander, I'don't believe it)
- Fully PC programmable with an optional USB cable
- DTMF and multi-function microphone (looks very smart)

Cons:
- Compander: sure, the compander is great in TX and for weak signals, but in regular traffic with your neighbors running 50 watts and 0,5 km of QRB....Is not possible via menu and prog to activate the compander in TX only, I'll search a mod....
- Manual: NO COMMENT!, very few functions are documented....I agree that the radio is simple and may be used without manual, but .....anyway, you MUST download the TYT manual and software for programming this rig, see the this page on the 'net: http://tinymicros.com/wiki/TYT_TH-9000 for donloading.


Despite to the manual, this is a very good radio for the buck!

  •  Autophon Radiovox SE-155 (Ascom SE-155)

OK, after a dream radio, let's go to some different job: I've found on the Bay a very cheap surplus. I've bought for fun mods on 2 meters band. Stay tuned for following chapters


lunedì 12 novembre 2012

Alternative microphone for Yaesu FT-817

Since I'm using the 817 mainly in /P, the original mike supplied with the radio is very stressed for the job. I've found an alternative one wich seems very useful for me: Vertex MH-67A8J. This mike is pin-compatible with MH-31 and is factory-supplied with Yaesu Ft-450 and also with some Yaesu/Vertex Land Mobile Radios (like VX-2100).


Is very big (almost twice that MH-31) and looks very rugged.

I've got one for few euros for an Italian ham and I've done a few on-air test on last sunday, and other hams reports that sounds identcal to MH-31.

venerdì 24 agosto 2012

TS-50 to LDG Z-100 plus connecting cable

Using the infos gathered on the net and showed in my previous post, I'm ready to build a quick-and-dirty cable.

Purpose of the cable:
- DC supply the LDG tuner from TS-50 ACC connector
- enabling the "AT TUNE" button on TS-50

The sketch below shows the circuit (press to enlarge). The ACC conncetor is shown radio side.


The TT and TS lines are connected together via a 3.3 Kohm resistor. The + and - lines are connected to LDG power conenctor via a 1 A fuse on the NEGATIVE path of supply lines.The ACC connector used is a PC surplus connector as shown elsewhere in my blog.

The final result is in the photo below:


Ok, seems like a sort of wire patchwork (green, white, black, red, yallow....) but IT WORKS!

Using the tuner with this cable is simple:

- Press TUNE button on LDG
- Press AT TUNE button on TS-50
- Wait for a match
- REMEMBER to shutdown the carrier pressing again AT TUNE on TS-50

Interfacing Kenwood rigs to LDG Tuners


I need to connect my LDG Z-100 plus tuner to my Kenwood TS-50, and googling on the net I've found some useful information in order to understand the Kenwood tuner interface. I'll show the much interesting things I've found, may be useful tu someone. (some of the documents linked are in Italian)

Technical Description of the Kenwood Tuner Interface:
http://www.ham-kits.com/KWTuner/KWT%20technical%20description.pdf

Other interesting things:
http://home.ix.netcom.com/~hmlong/

http://www.arimagenta.it/progetti/pdf_doc/ICOM%20TUNER%20+%20RADIO%20KENWOOD.pdf

http://www.kb2ljj.com/data/kenwood/ts-50.htm (scroll down)


giovedì 9 agosto 2012

Cheap ICOM tuner connector

Playing around with an LDG Z-100 Plus which I've bought for my Kenwood TS-50, I've seen the ICOM cable which is delivered in the box of the tuner.


If you look at ICOM tuner connector, seems really very similar to Personal Computer hard drive supply connector

The PC molex plug fits near perfectly on ICOM connector! Great, anotter connector for free!

Cheap Kenwood ACC connector

I need an ACC 6 pin connector for my Kenwood TS-50:


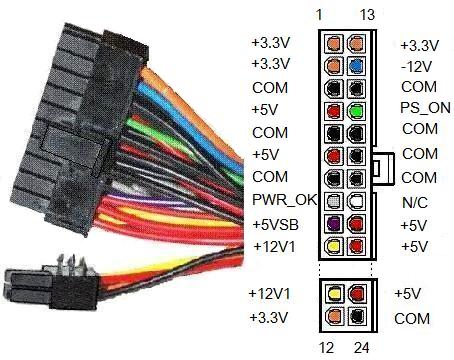
The connector seems very similar to ATX power supply connector (the power supply of the modern Personal Computers):


When I'm approaching to do some saw wors to cut six pins from the 20-pins connector, I've found that the LDG ATU cable for Kenwood rigs have only FOUR pins connected:
Looking at Kenwood docs, I've found that the two left pins (Transceiver side...) are the lower not connected and the upper connected at a signal ground. If LDG thinks that the signal ground is of little or no use, I'll follow the boss! I use the 4 pins in the detachable section of the connector (lower in ATX conn. image)


A little work with a screwdriver blade (light and softly!!!) in the middle of pins and...VOILA'! The connector is found for free!